- This Week in Rookly
- Posts
- Rookly Fall 2025 Season - Week #8 Results!
Rookly Fall 2025 Season - Week #8 Results!
Your weekly recap of league standings, plus a look at the Move of the week, the Game of the Week, and a visit to the Coaches' Corner.
Lucas Thompson
December 08, 2025

Welcome to the Fall 2025 weekly newsletter! This is where we will share a weekly update on league standings, highlight some great moments from each week’s games, learn a thing or two from our coaches, and of course, share news about Rookly.
First let’s look at last week’s scores. You can click on the title of a league to view the full standings for that league. The standings pages are public, so please feel free to share with parents, friends, or whoever you think might be interested!
And now, without further ado, here are the results of the eighth week of the Fall 2025 season:
Week #8 Standings
(4:00pm ET) | (3:30pm PT) |
|---|---|
Cardinal Kung - 149 | WIISER - 186 |
Newman - 123 | Temecula Prep - 151 |
Drew Charter - 101 | Lakeside - 130 |
Pennfield - 95 | Alta Vista - 116 |
Hannah Senesh - 93 | Moreland - 109 |
(3:30pm ET) | (4:00pm PT) |
|---|---|
Pace Academy - 161 | Stanford Online - 164 |
Ransom Everglades - 146 | Holy Ghost Prep - 98 |
Grayson - 136 | Temecula Prep - 89 |
The Journey School - 117 | St. Joseph’s Notre Dame - 68 |
Lake Center Christian - 114 | St. Mary’s / Archer - 64 |
(5:00pm ET) | (3:00pm ET) |
|---|---|
St. George’s - 132 | Opportunities For Learning - 164 |
Montgomery Academy - 124 | St. John Paul II - 124 |
Rogers - 119 | Hendersonville - 111 |
Lake Wales Charter - 61 | Nativity Prep - 94 |
Tulsa Honors - 50 | Marvin Academy - 60 |
(3:30pm ET) | (4:30pm ET) |
|---|---|
Calvary Day - 141 | Trinity Episcopal - 125 |
Camden Military Academy - 101 | Leffell - 124 |
Overhills - 92 | Eureka Springs - 123 |
Nativity New Bedford - 85 | Lakeside - 103 |
Discovery Academy - 79 | Austin Jewish Academy - 101 |
Move of the Week
The move of the week goes to Noam G (black) from The Leffell School for finding the best move in this position! It’s black to move—see if you can find the winning continuation:
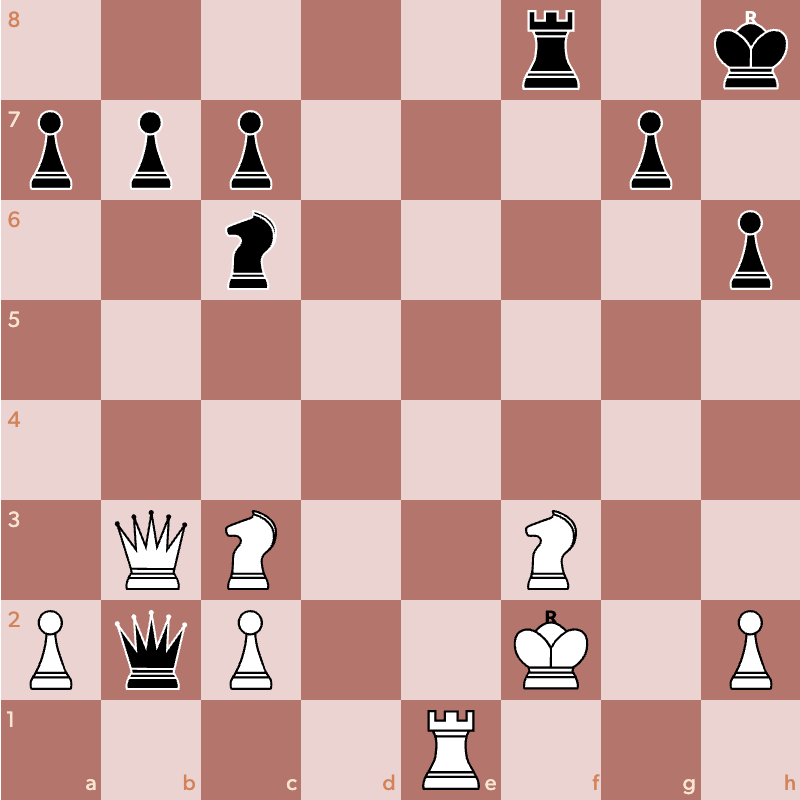
Black to move.
At first glance, it seems like black might be forced to accept the queen trade, but the winning continuation begins with a rook sacrifice on f3.

Rxf3+
In the game, white recaptured on f3 with the king.

Kxf3
This allowed black to play Nd4+, forking white’s king and queen!

Nd4+
Amazing work by Noam to spot the winning tactic in this game.
Game of the Week
The game of the week this week goes to Timmy W (white) from Scarsdale and Finn B (black) from The Study Academy for this beautiful 27 move game. Both players played excellently (perfect play for the first 11 moves) but it was Finn who was able to continue the perfection all game: zero inaccuracies, zero mistakes, and zero blunders.
If you were on the hunt for an instructive example of how to play the King’s Indian Defence, then look no further than this standout performance by Finn!

Coaches’ Corner
So far in our series of lessons on pawn promotion, we’ve looked at why the rook pawns can’t be promoted (given that the defending king is not out of position) and how the defending player can use opposition to force a draw if the player trying to promote leads with the pawn instead of the king
Today, let’s take a look at how to successfully promote a pawn, and why knight pawns need extra care to in order to do so.
The Goal Position
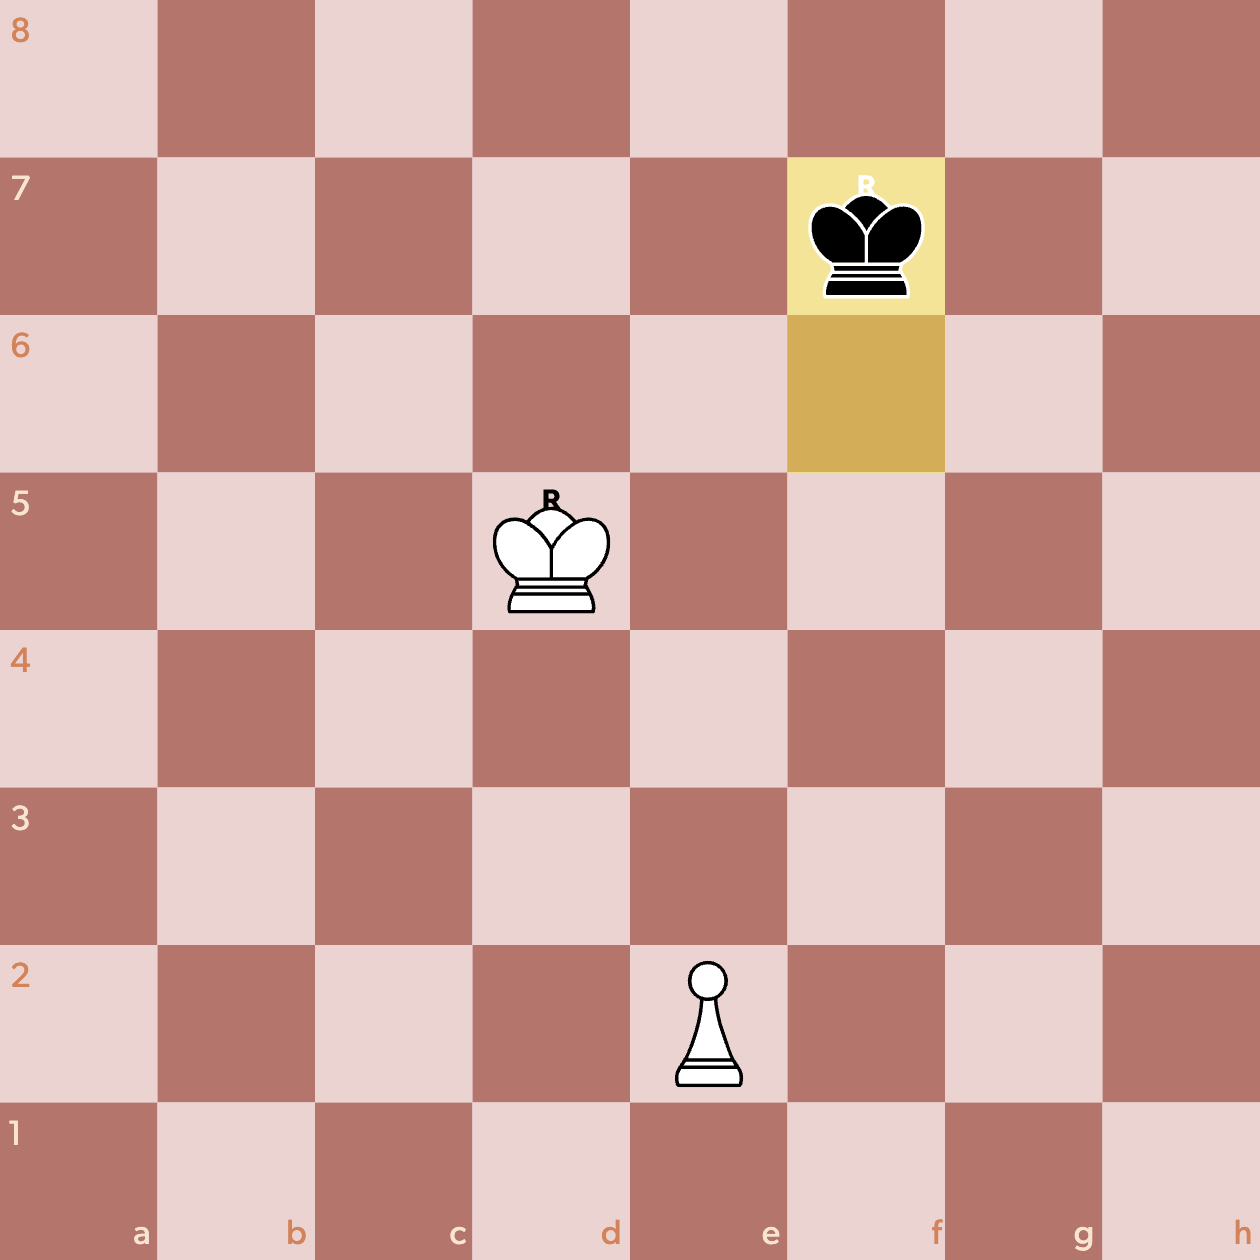
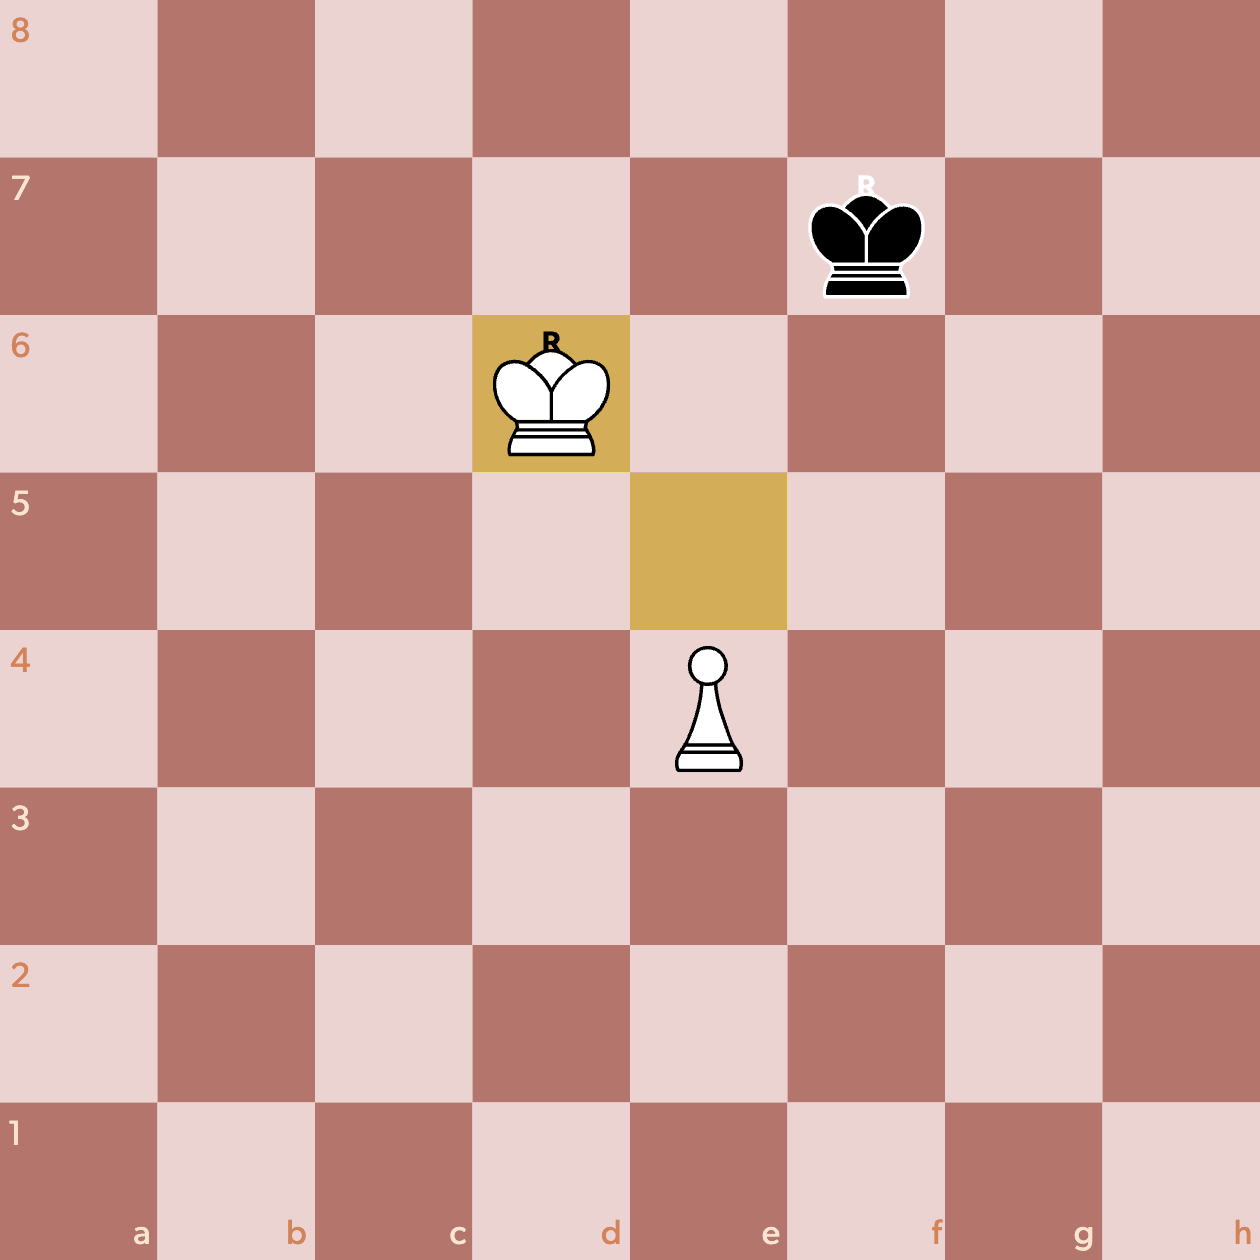
Let’s start by taking a look at the position our king and pawn should be aiming for:
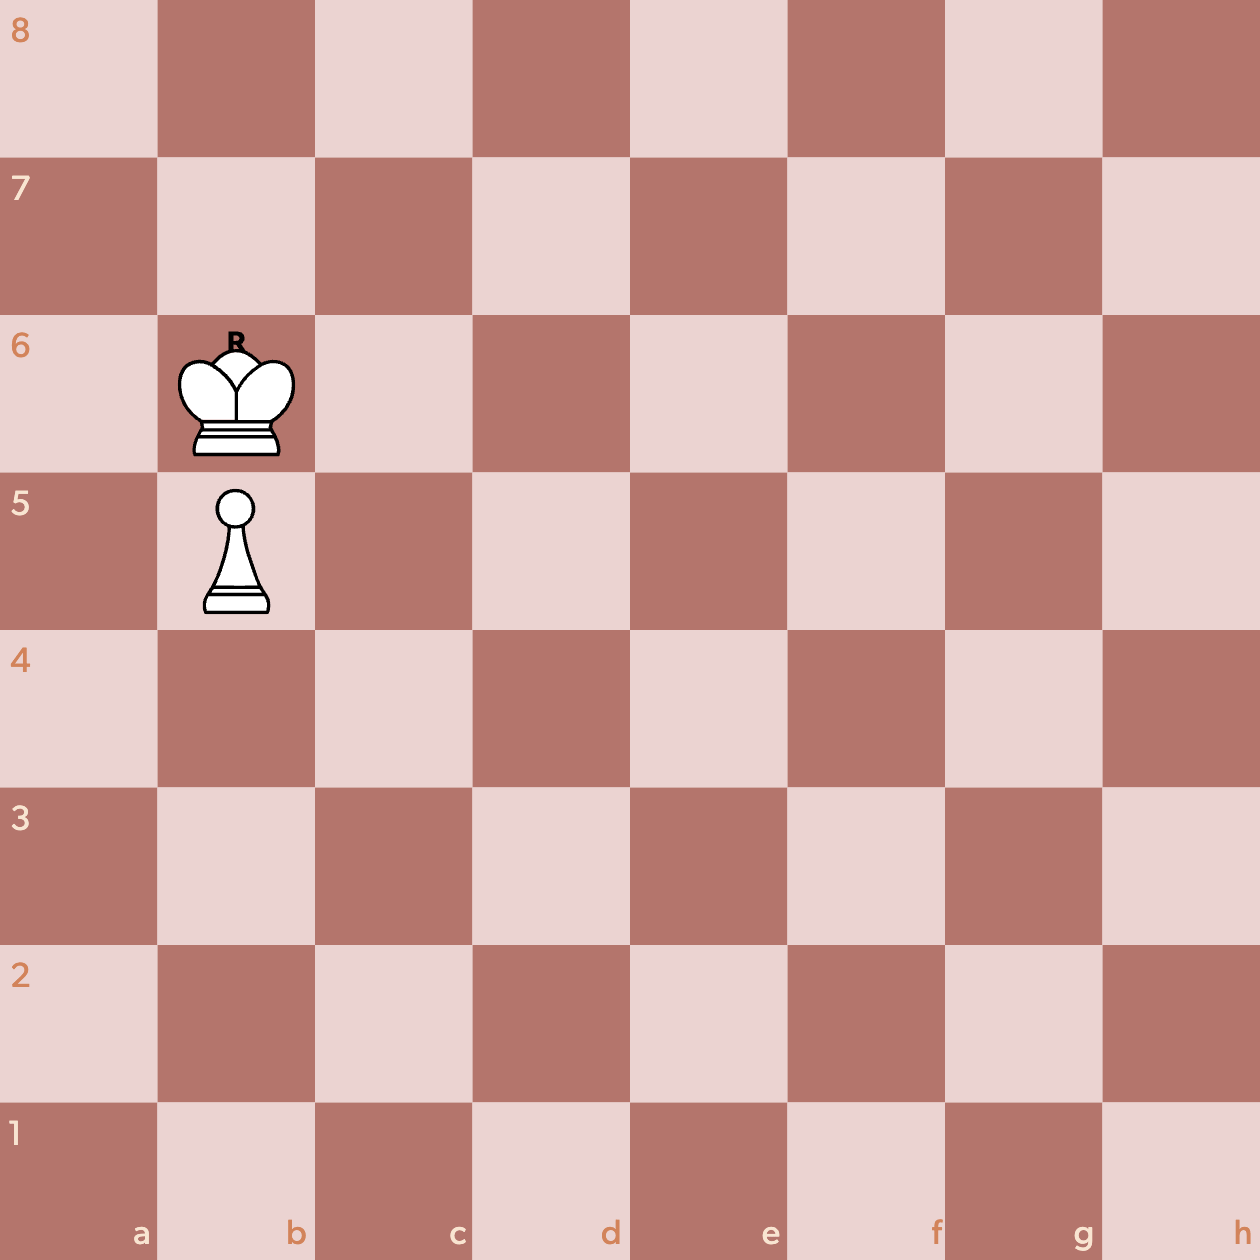
The setup we’re looking for.
We need to have the king leading the charge, ready to advance to the 7th rank so that the pawn can be pushed three times and reach the promotion square. If this king and pawn position is achieved, it doesn’t matter whose turn it is, or which file your king and pawn are on—this is a winnable position.
This setup is winning on any of the six central files.
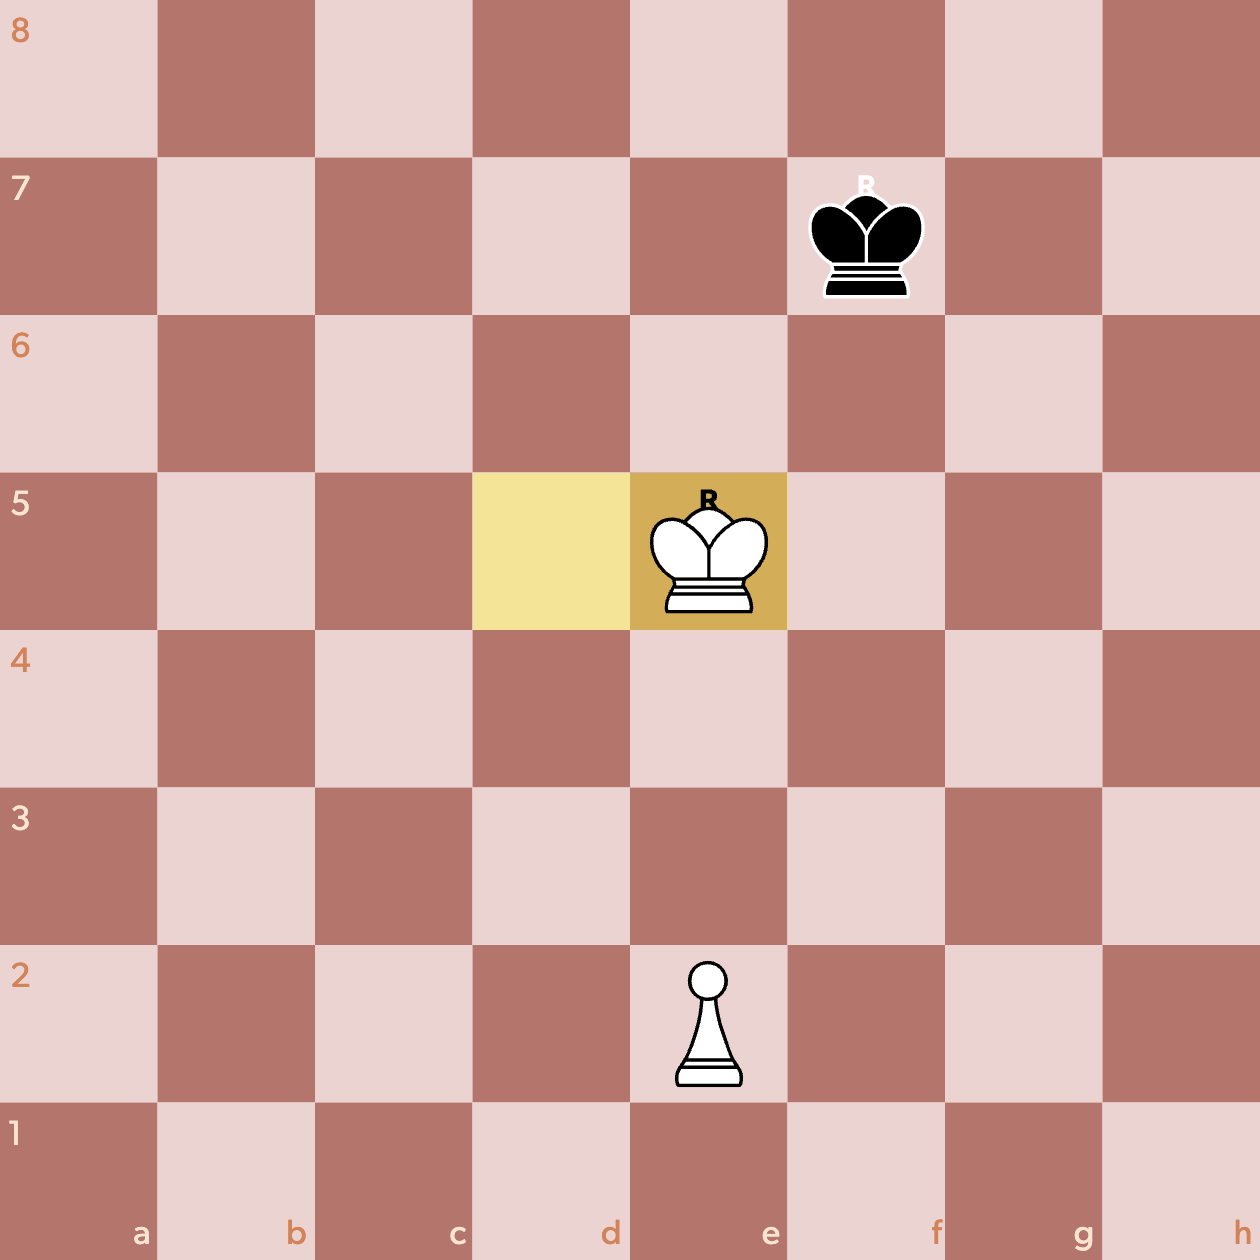
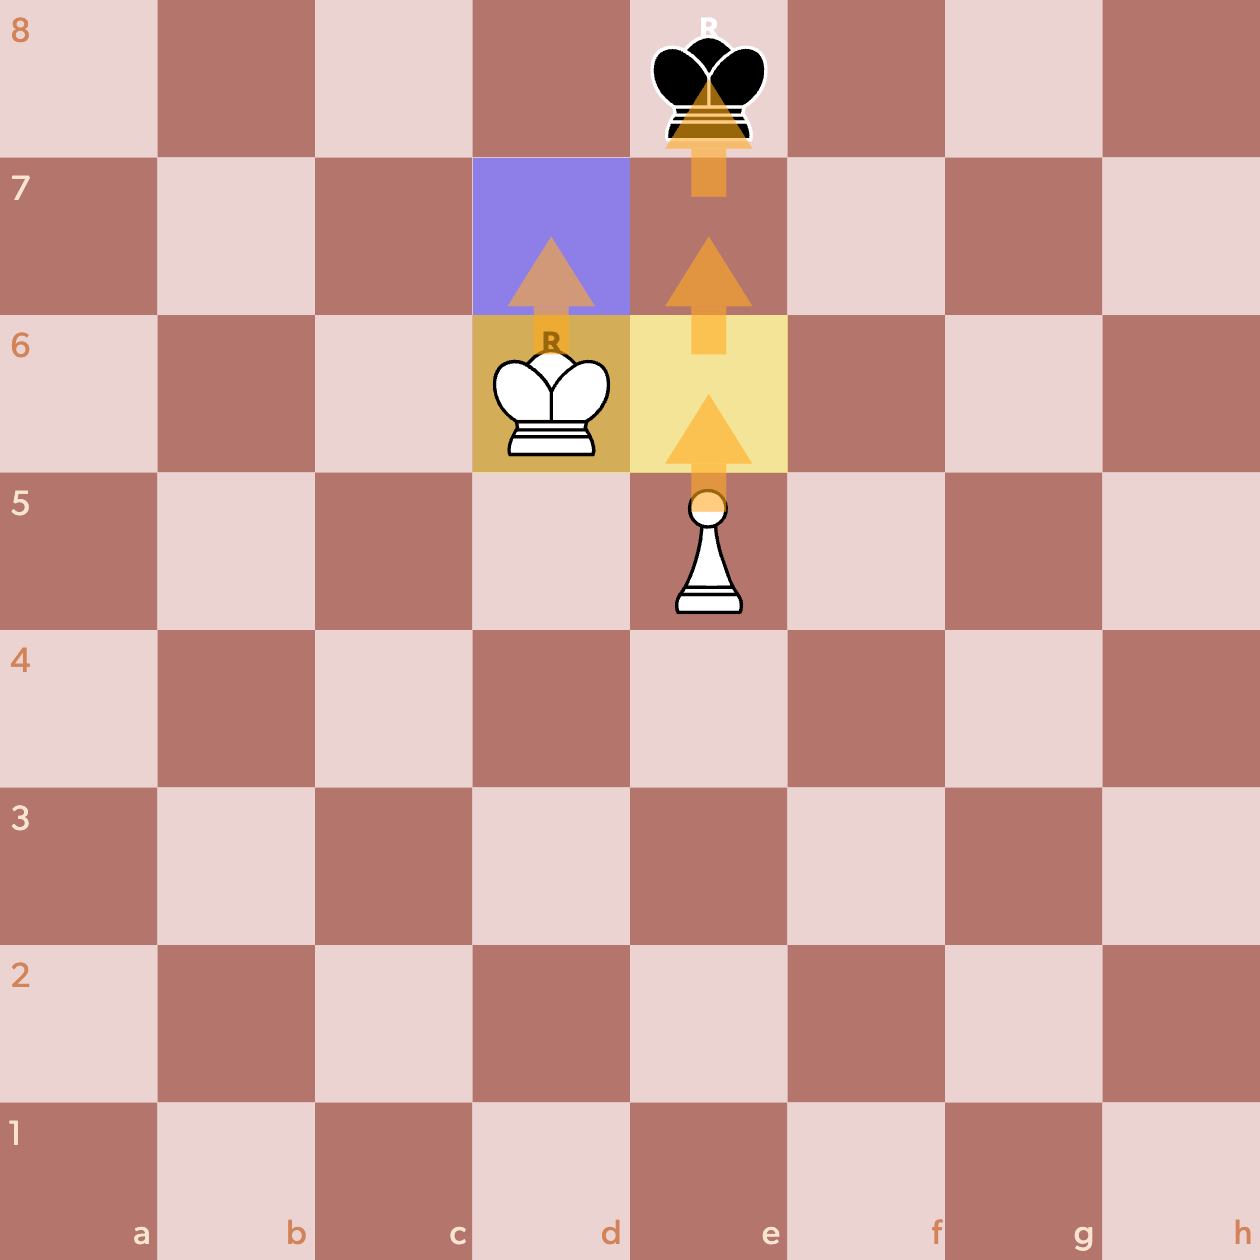
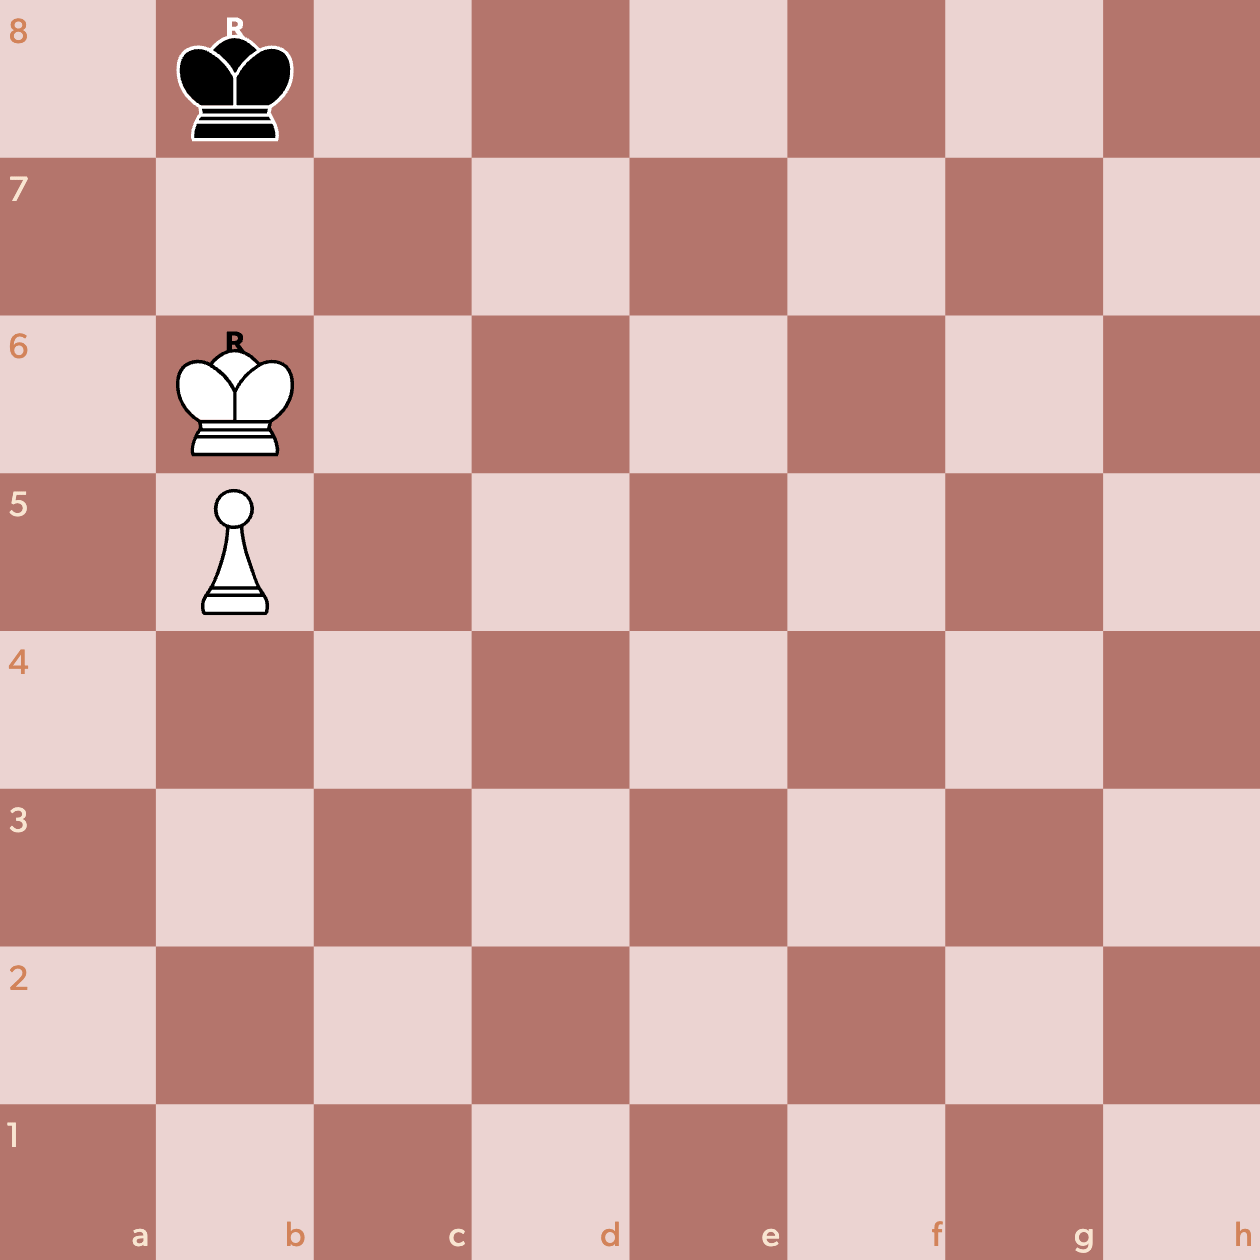
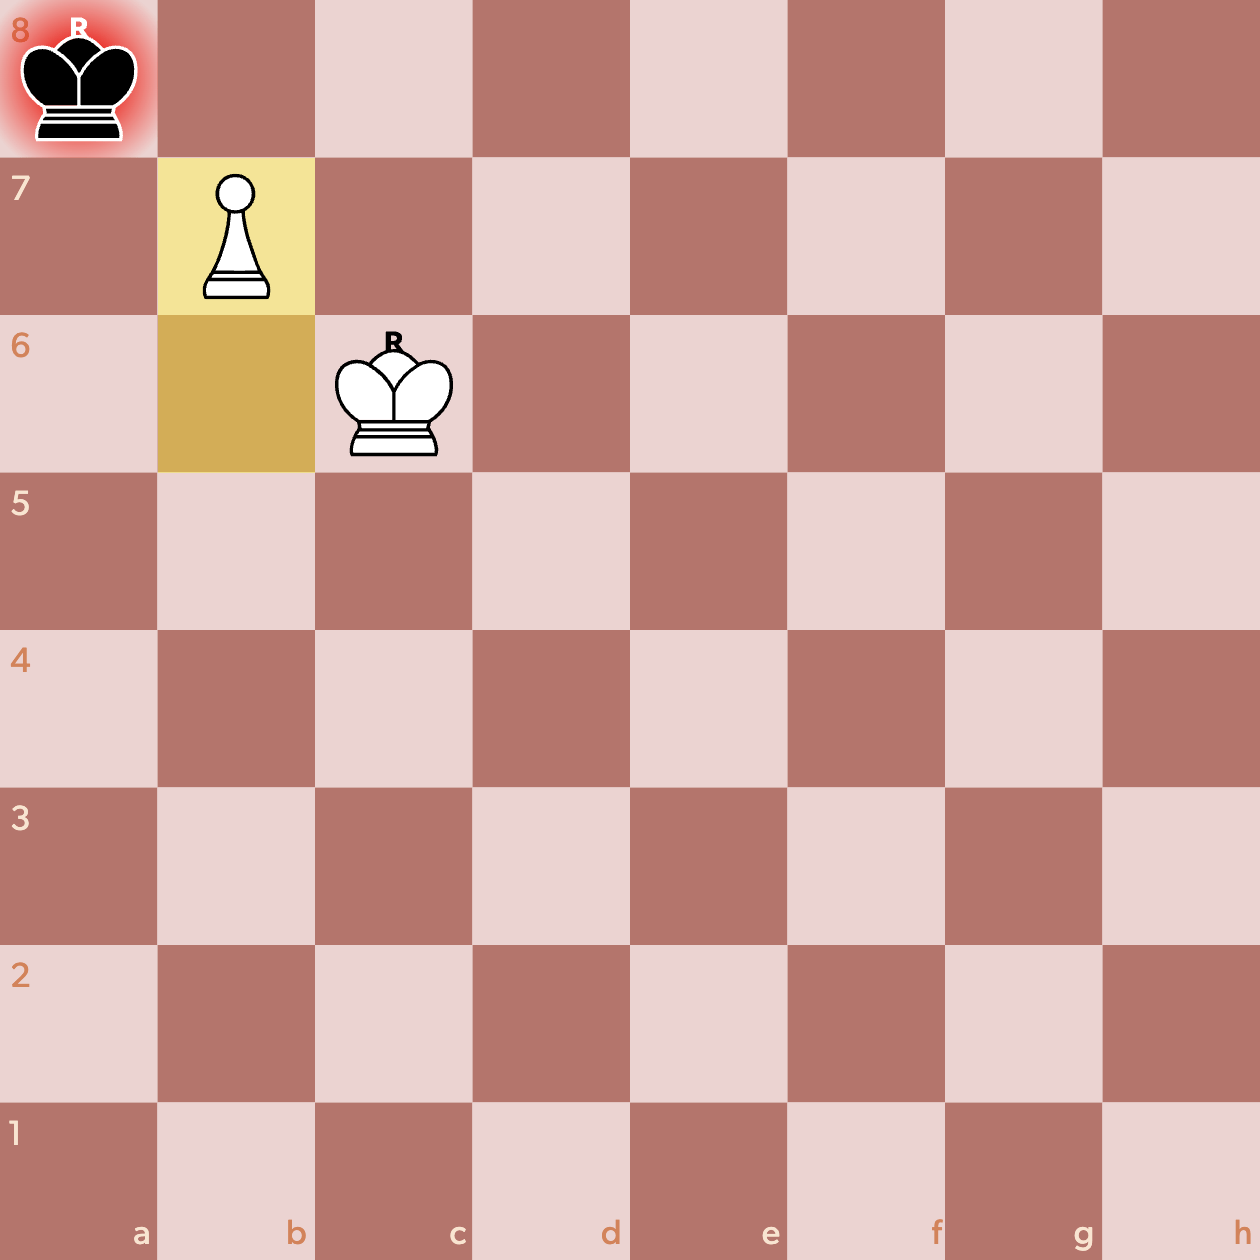
Starting with the Correct Piece this Time
Let’s start from the beginning. If you recall, this is where white went wrong last week, by moving with the pawn first.
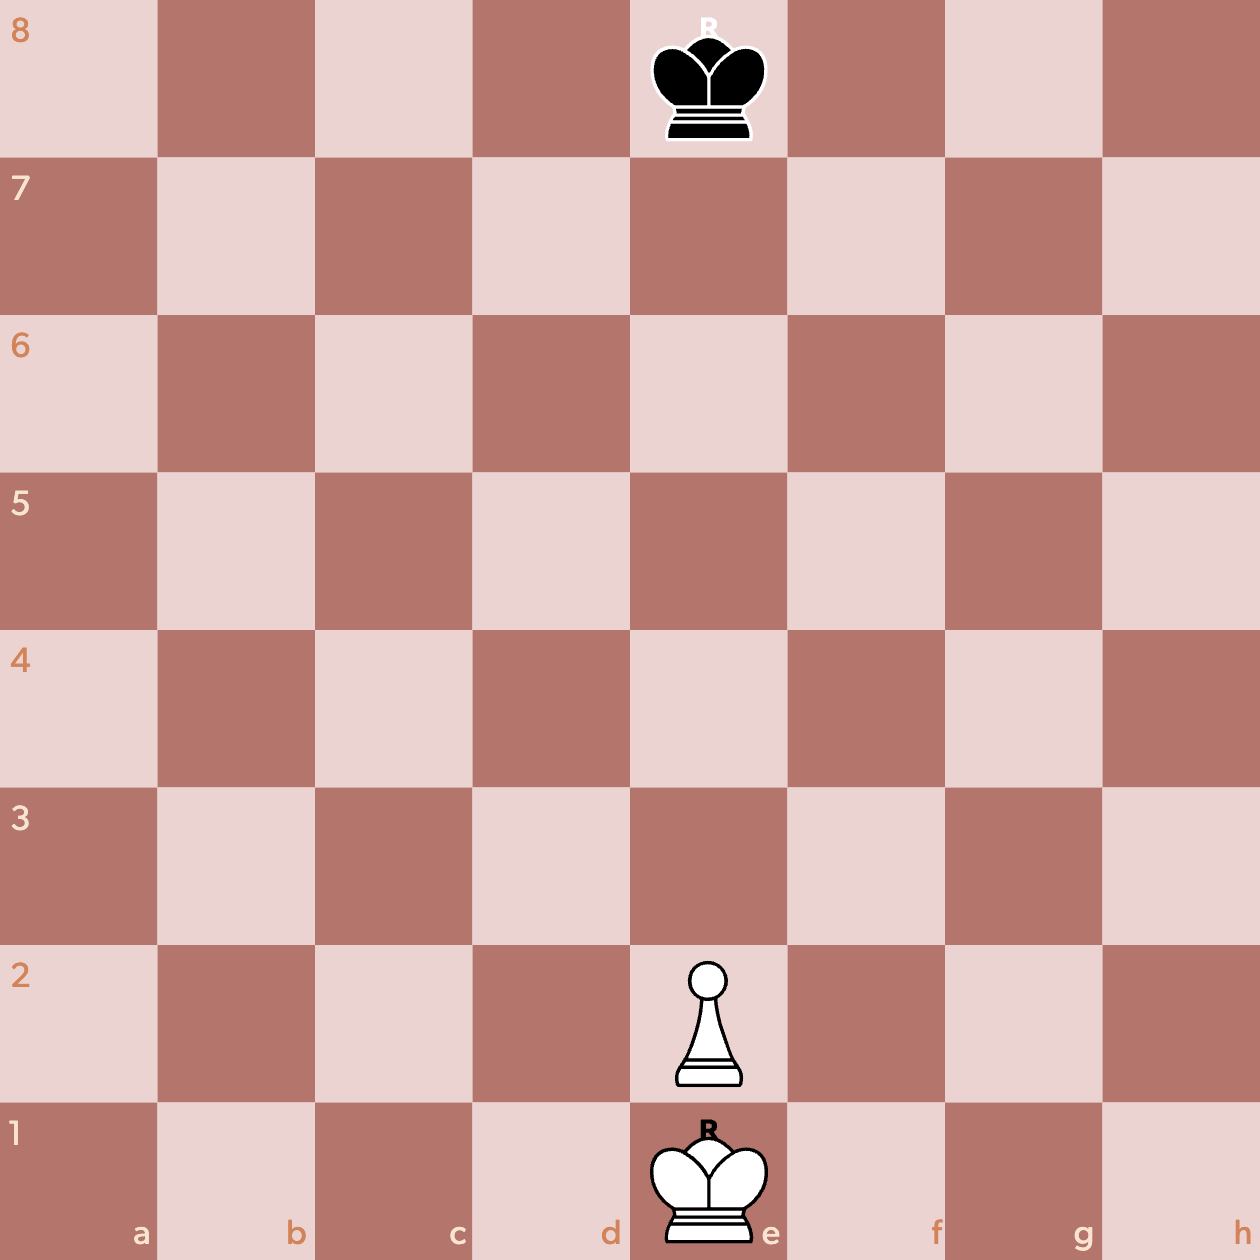
The starting position.
In order to successfully promote, white needs to lead with the king, so let’s get the white king in front of the pawn.

The first step.

The king leads the charge.
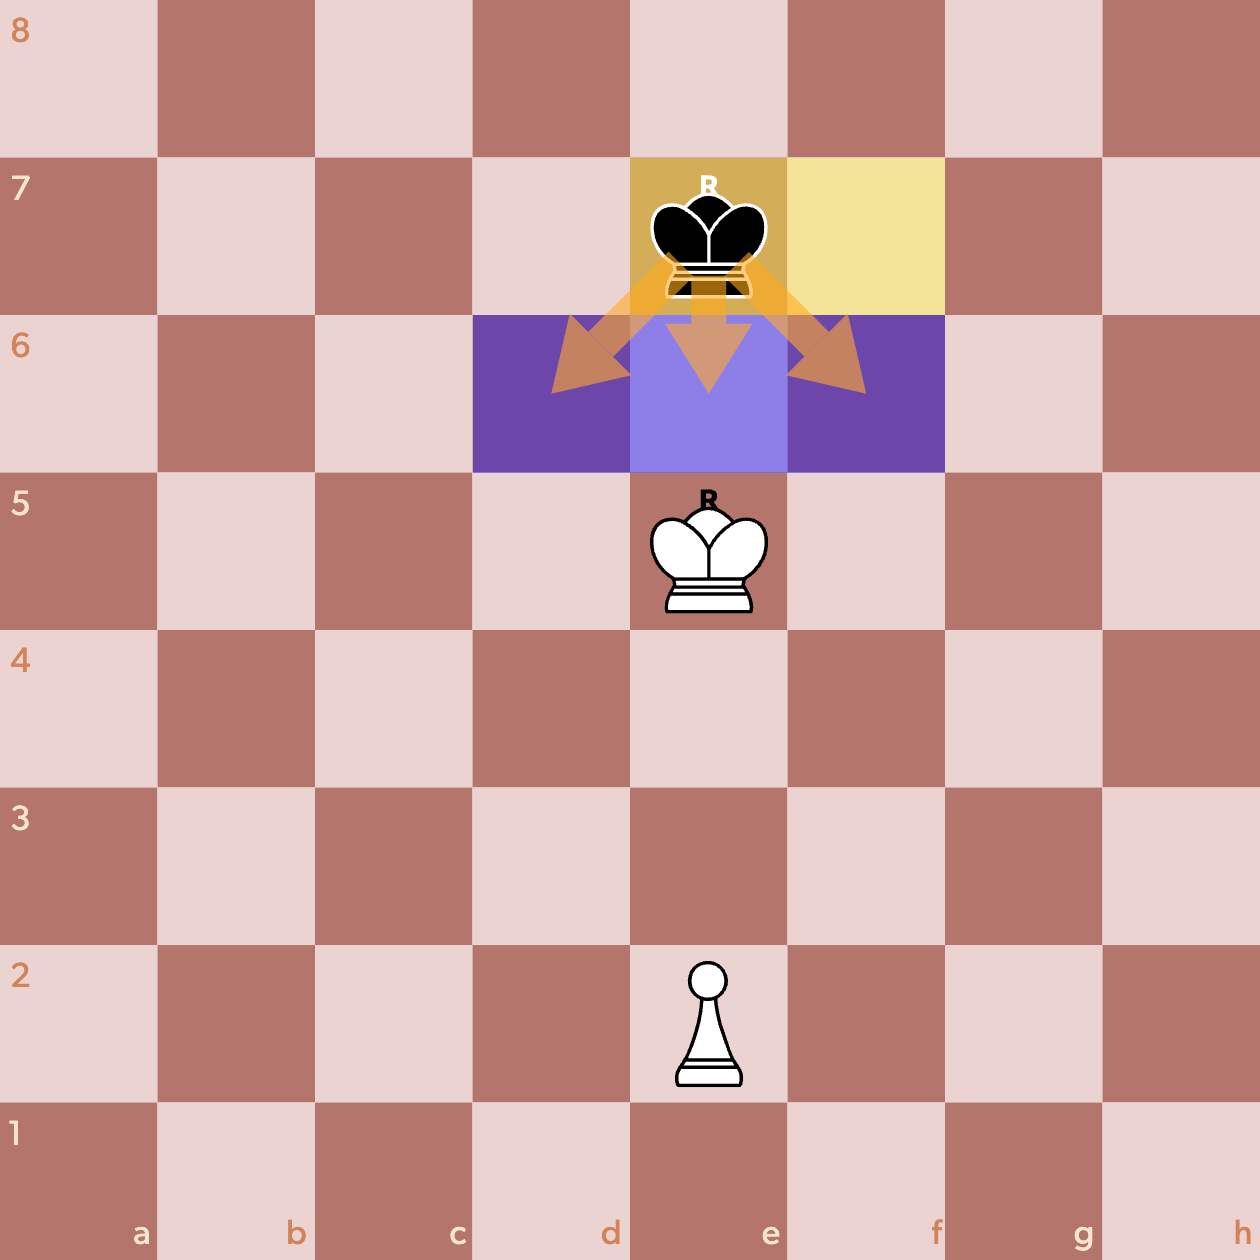
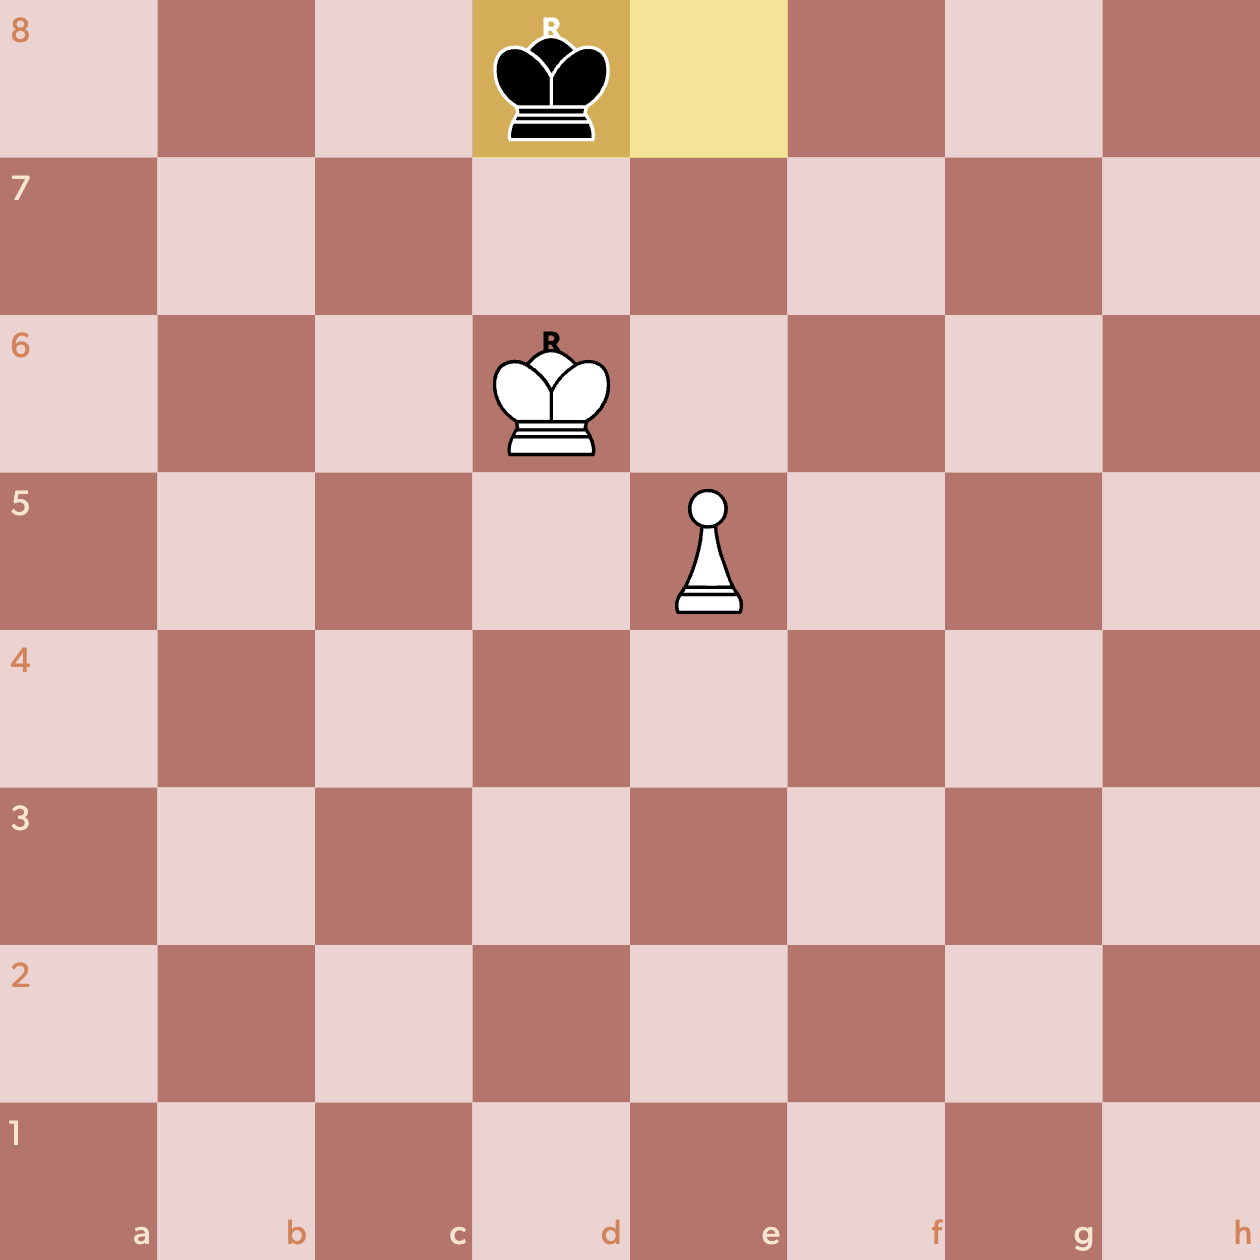
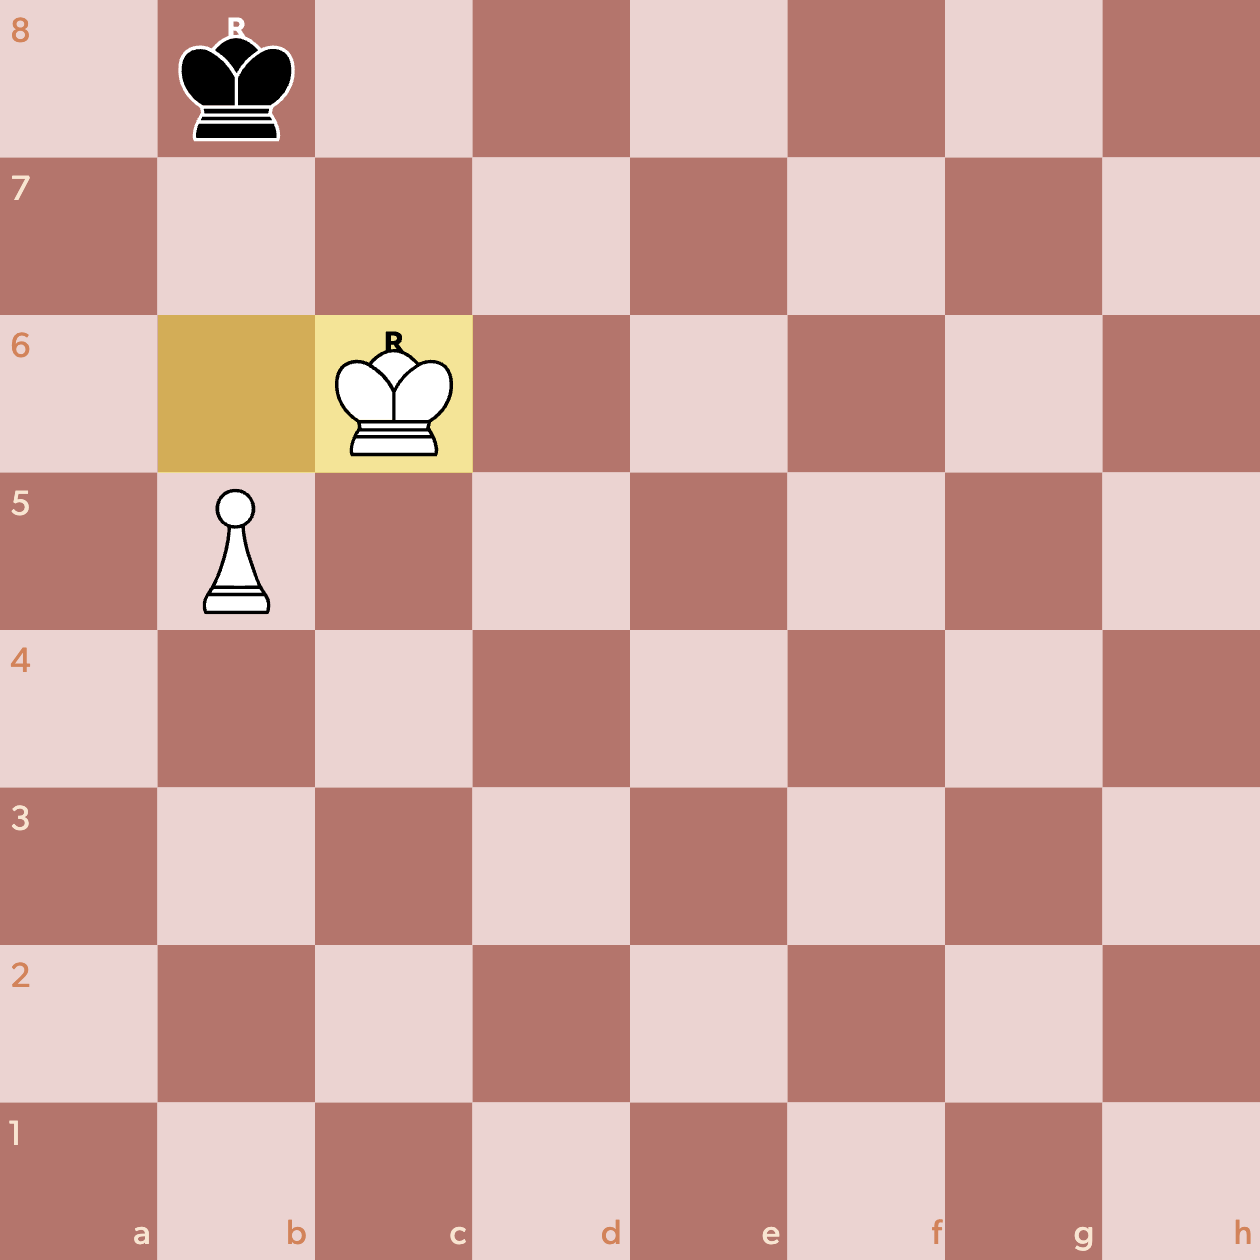
Offensive use of Opposition to Reach our Goal Position
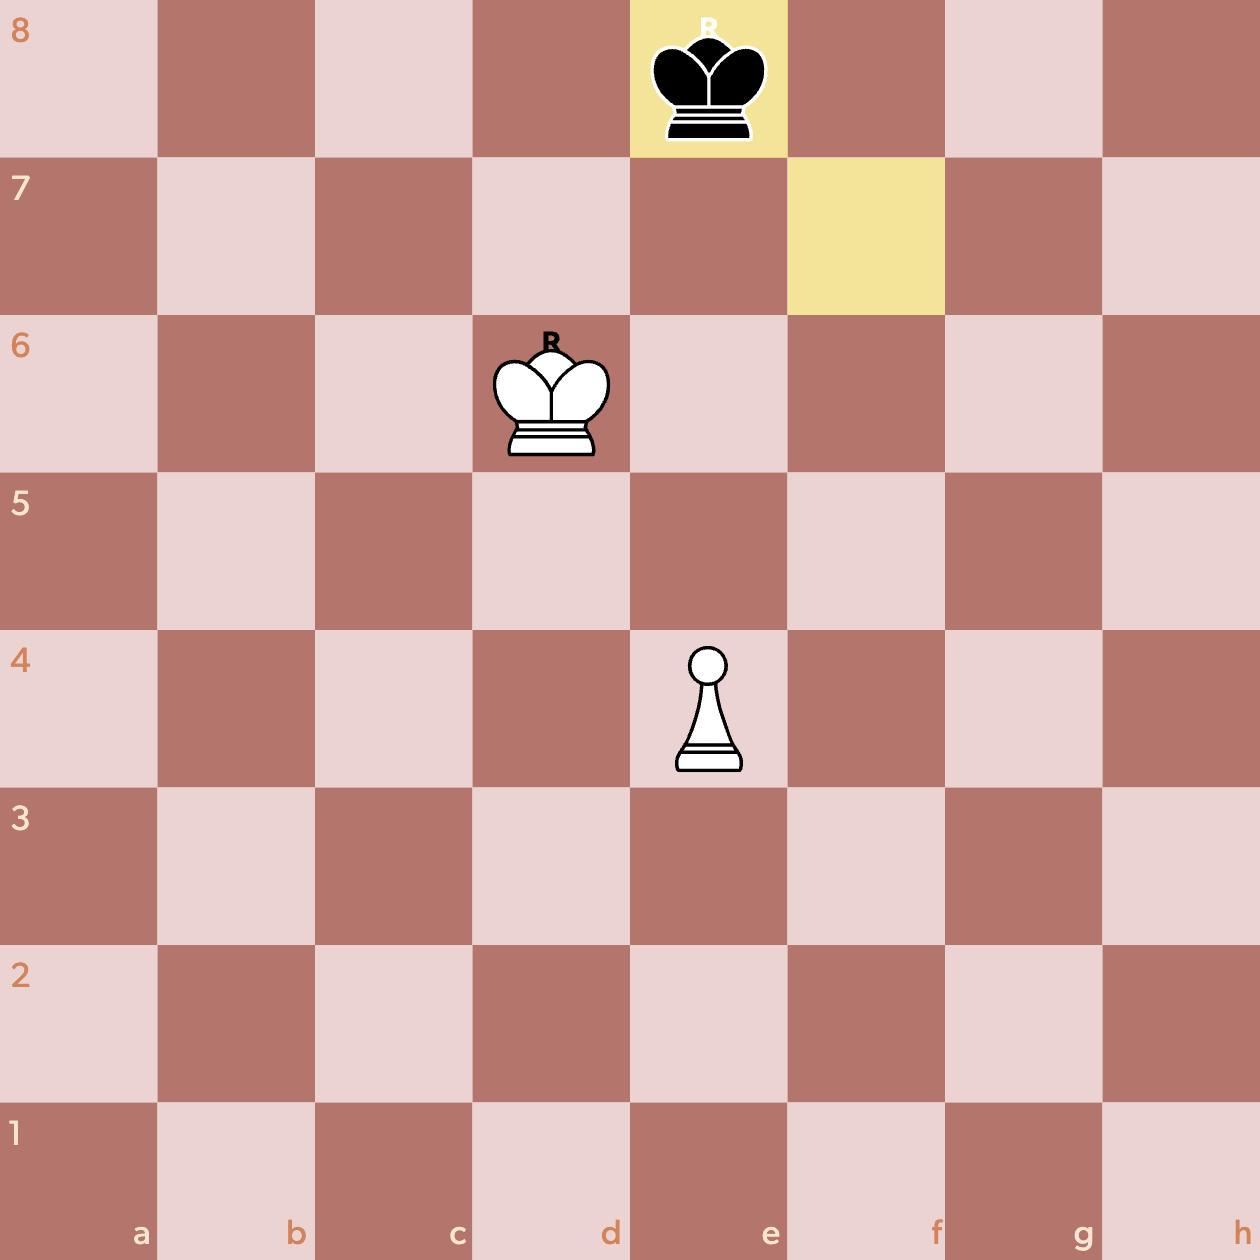
As black continues to approach (and make things as difficult as possible for us) we can advance the white king to take opposition.

White takes opposition.
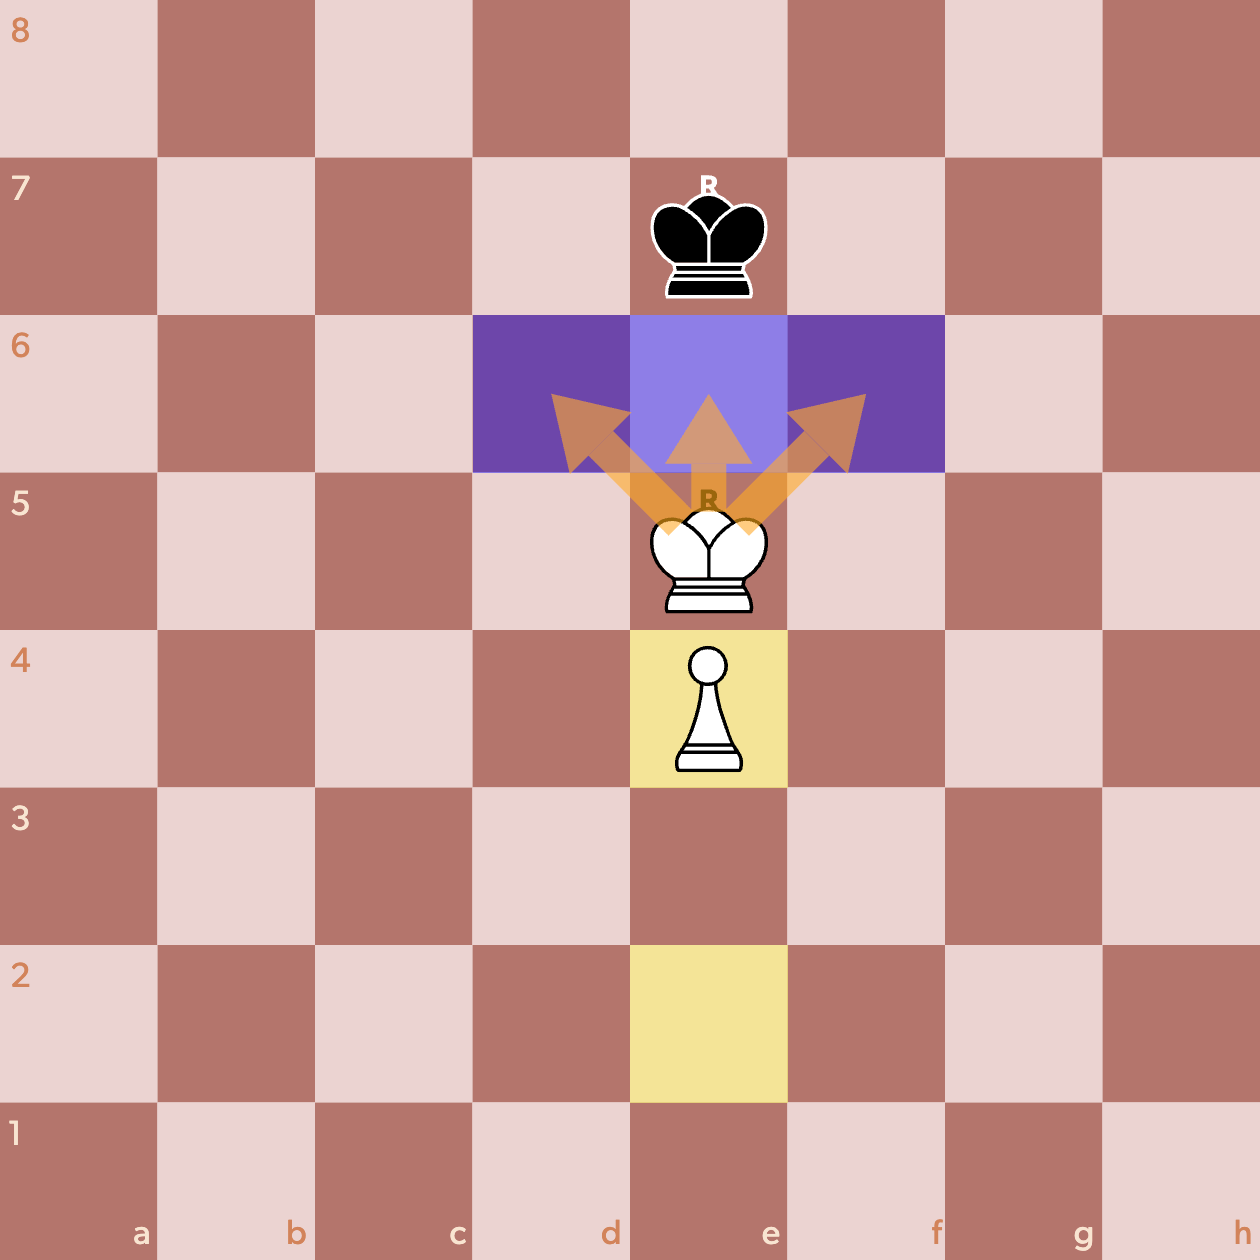
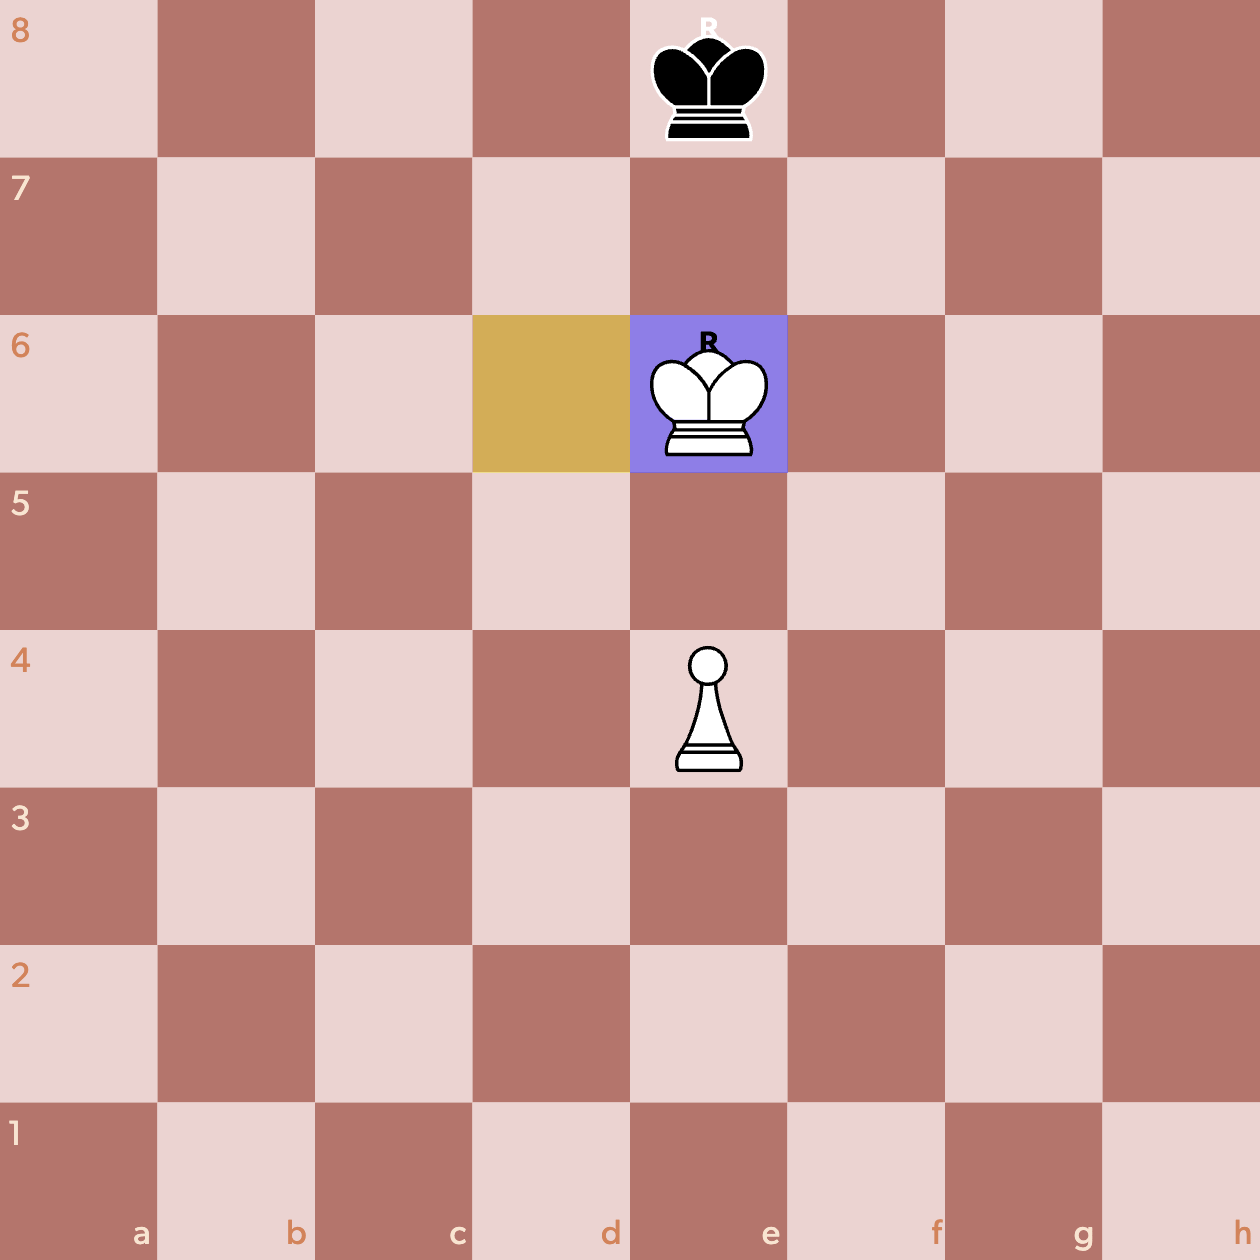
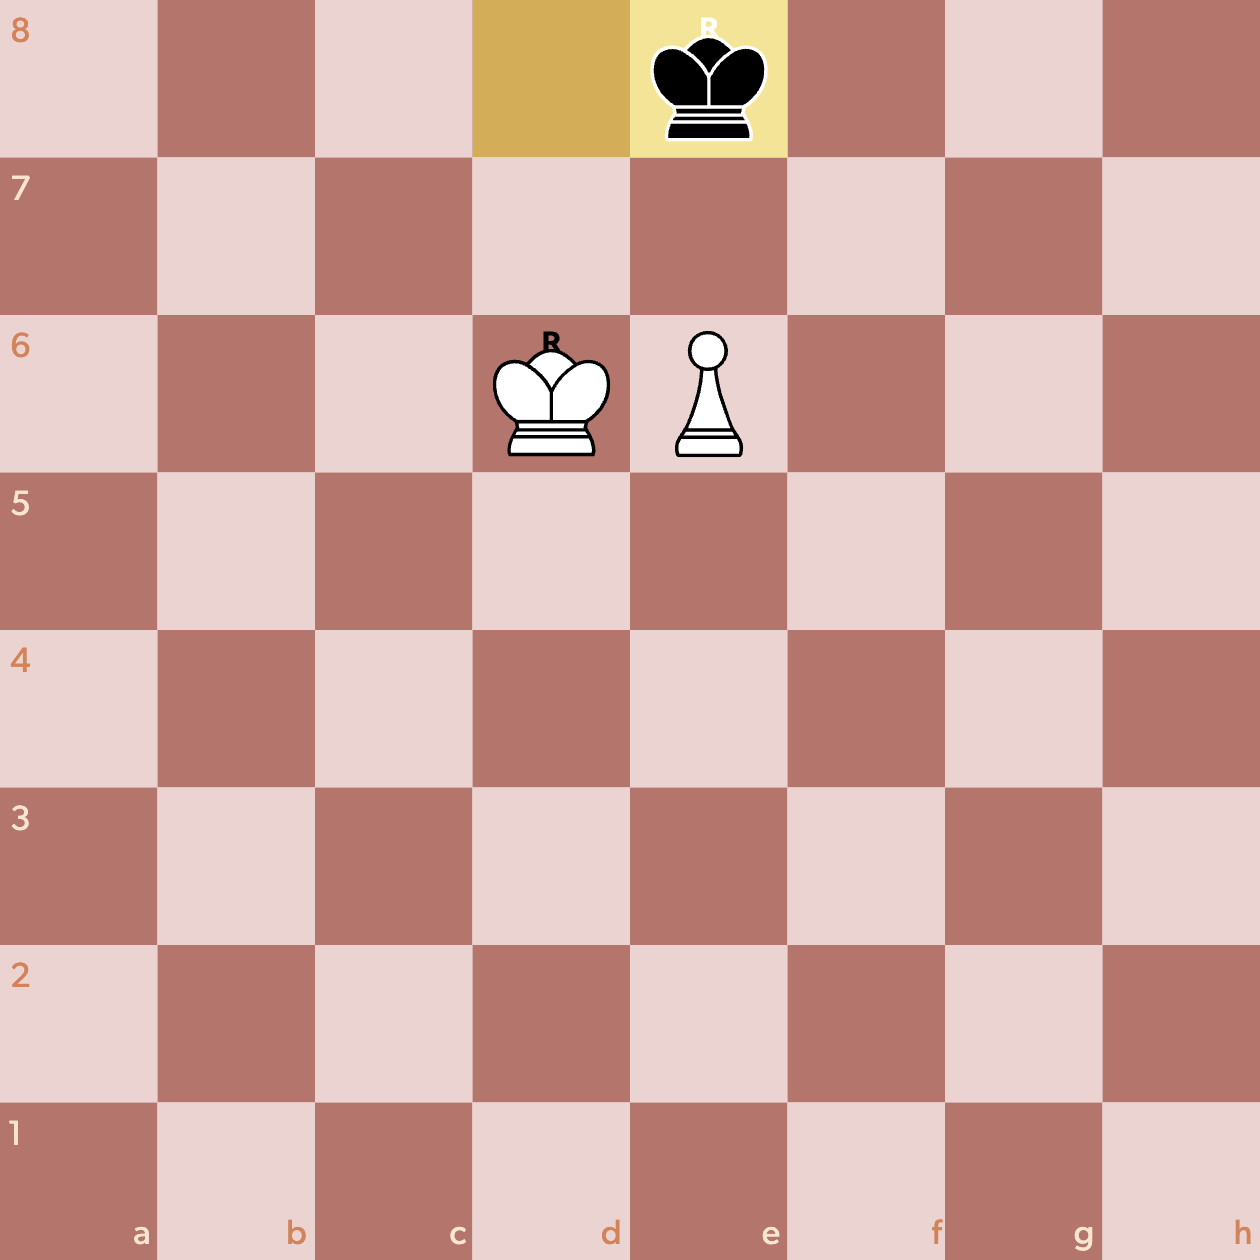
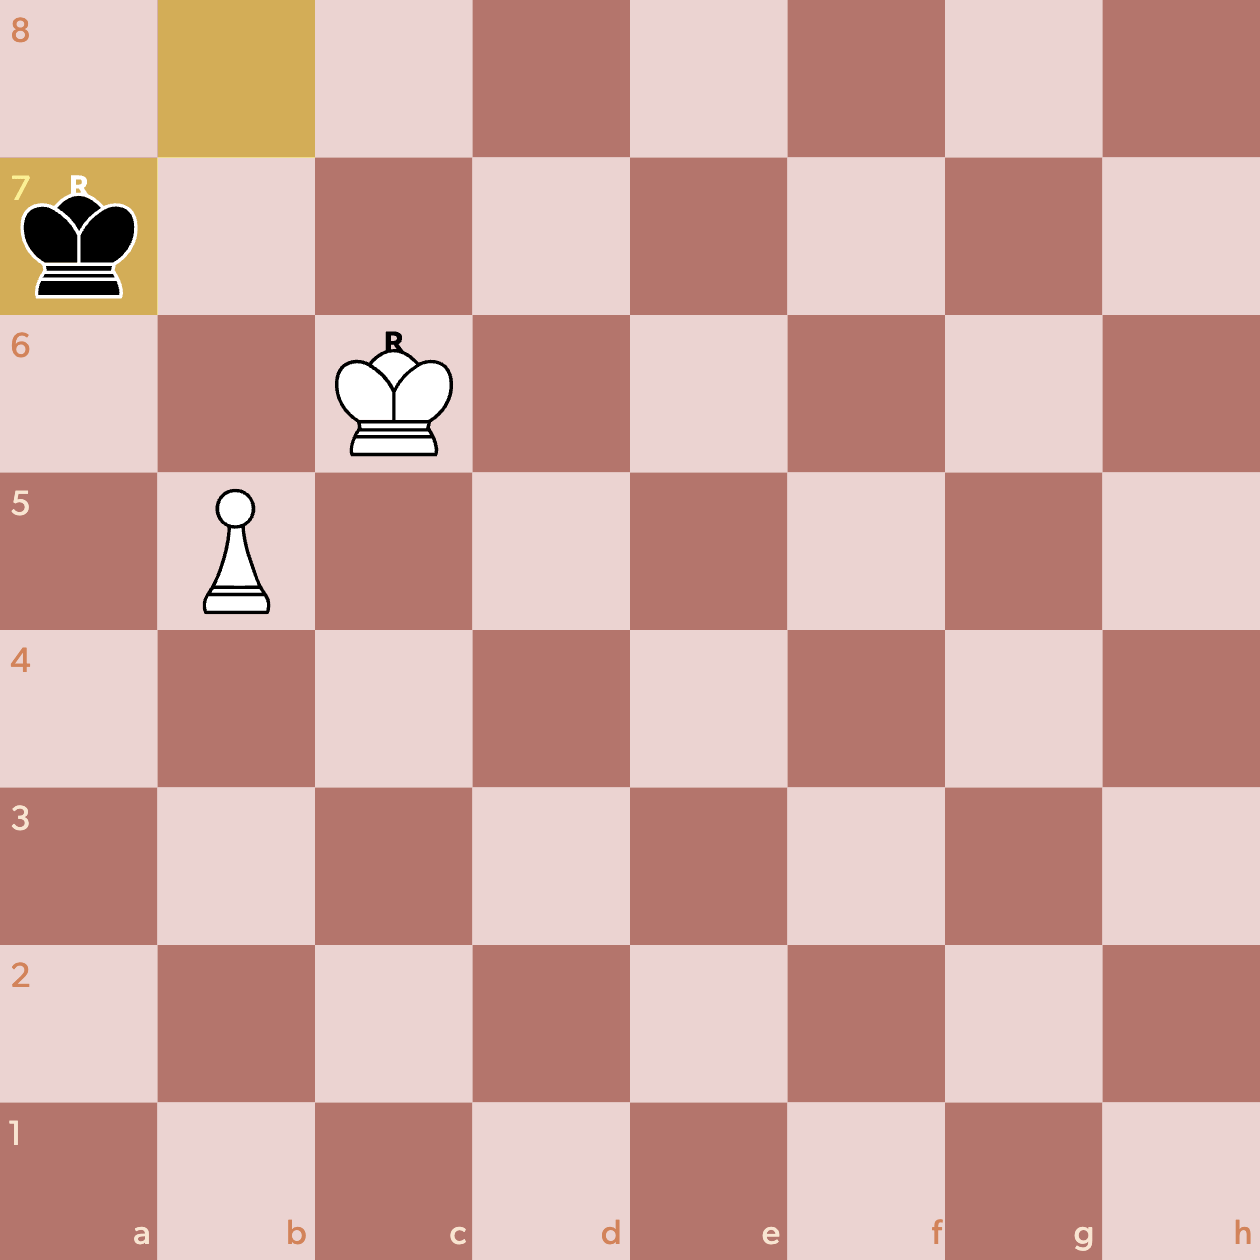
This prevents the black king from making any forward progress. After the black king makes a lateral move, we can outflank our opponent.

White outflanks the black king.
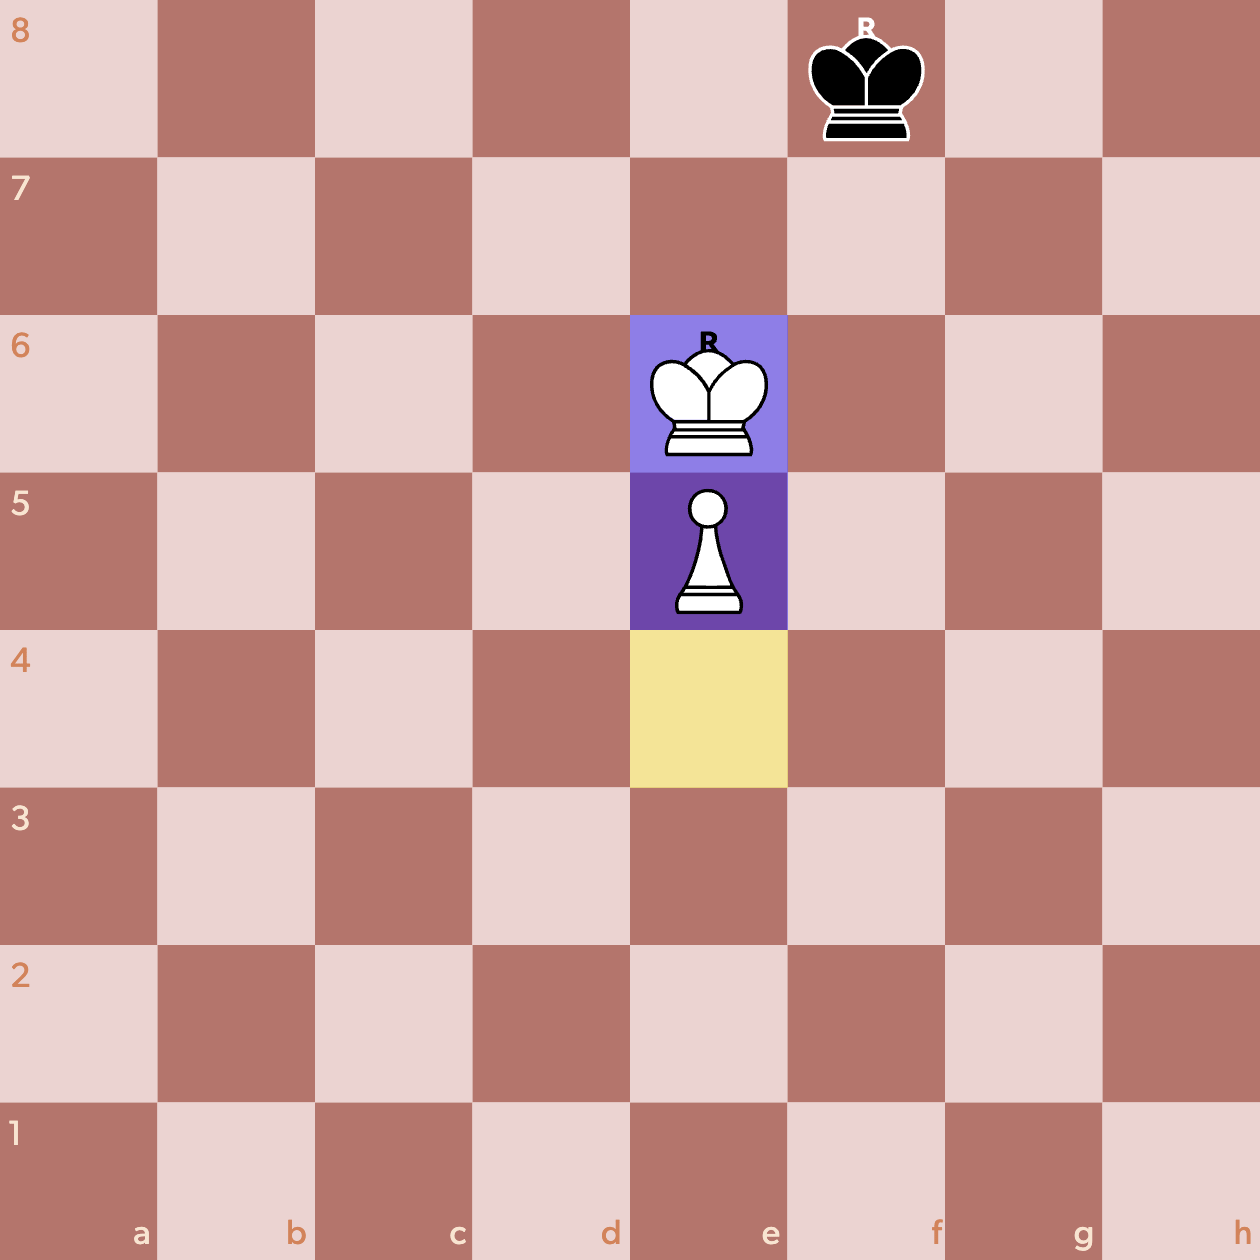
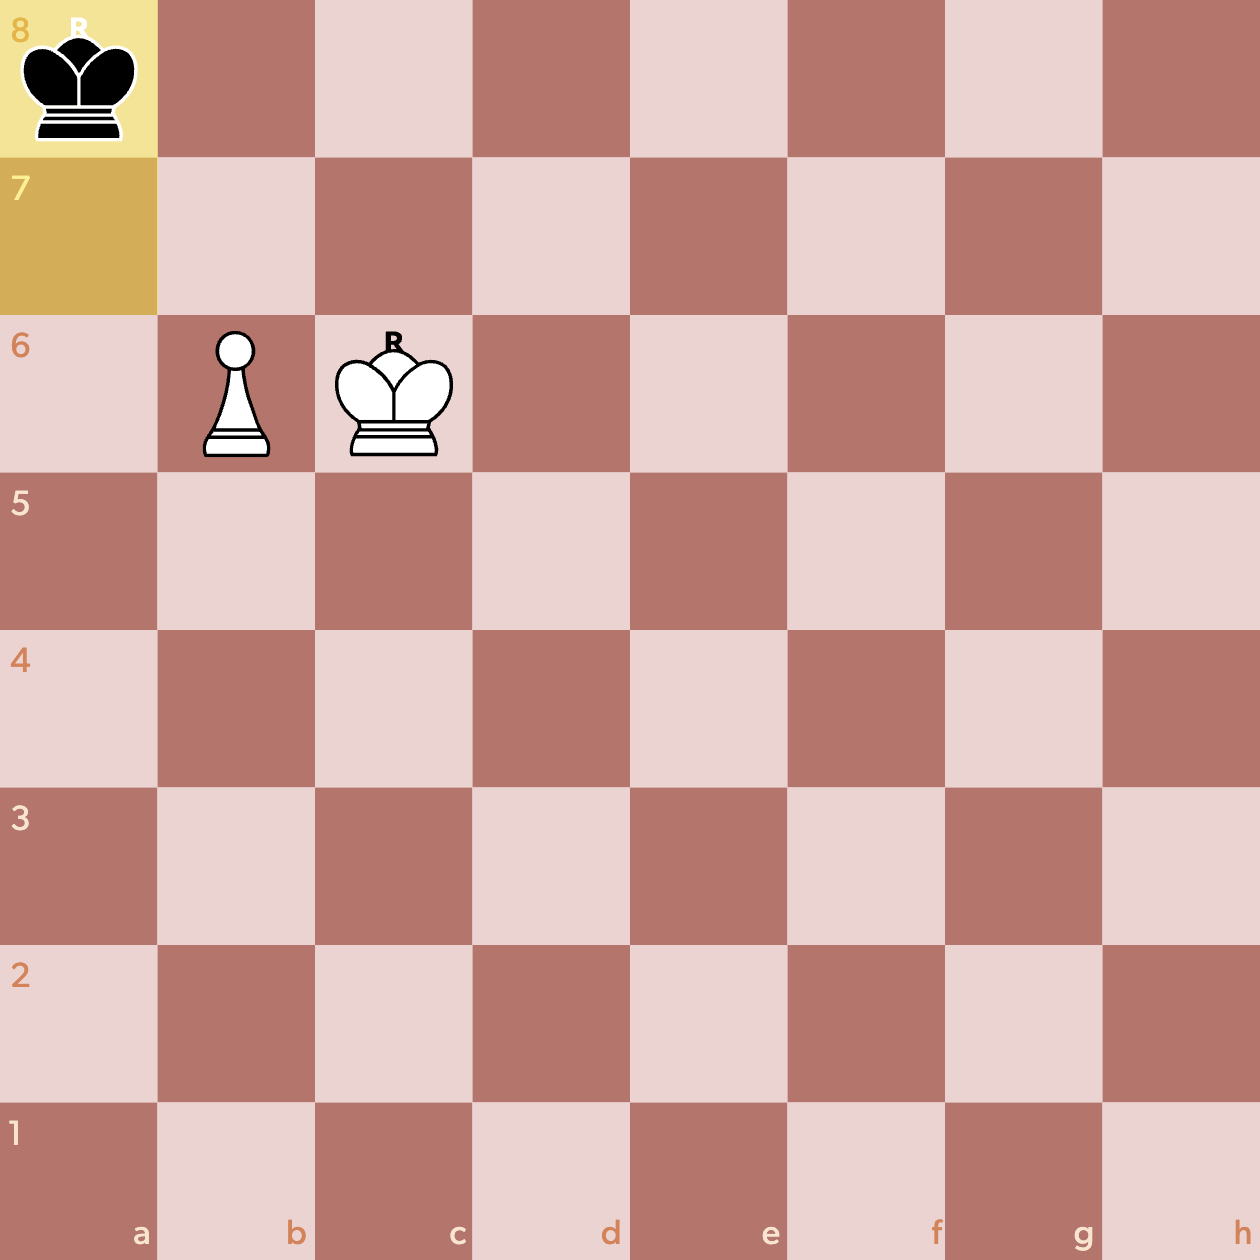
Black has no choice but to retreat here, as now the white pawn can advance to e4 and be defended by its king.
Black is forced to retreat.
The white king can still maintain its position ahead of the pawn and prepare to make further progress.
The white king stays ahead of the pawn.
Now black can take opposition, but as white here we have a trick up our sleeve.
Black takes opposition.
After we advance the pawn, we take opposition right back.
White takes opposition by moving the pawn.
The black king has no way of entering white’s space, and so is forced to make another lateral move, and now we are back in a familiar position where we can outflank the black king once again.
Outflanking black once again.
This time black tries to stay on the same file as the white pawn.
Black stays competitive.
It makes no difference where black goes, as our king can now reach its goal square on the 6th rank.
The white king reaches its goal square.
Black only has two legal moves now, and no matter which direction black chooses we can advance our pawn to its goal square on the 5th rank.
The white pawn reaches its goal square.
How to Promote the Pawn
Black takes opposition again, and our king can choose to move to either side to make way for our pawn.

White can pick either side.
Our ideal setup is now to have our king on the 7th rank to defend the pawn as it makes its final three advances.
White’s new goal—reach d7 with the king and push the pawn while it is defended
Black will undoubtedly try to make this difficult by taking opposition once more.
Black takes opposition once more.
But we can simply advance our pawn to e6, and black is forced to defend on e8.
The white pawn advances to e6.
Once we advance our pawn to e7, black’s only legal move is Kf7.

The white pawn advances to e7, and black is forced away from e8.
And from here our king can get to d7, defending our pawn’s promotion square on e8. The black king simply has no way of interfering with the promotion of our pawn.

Black cannot combat the white pawn’s promotion.
From here we can promote and go on to win!
White has promoted!
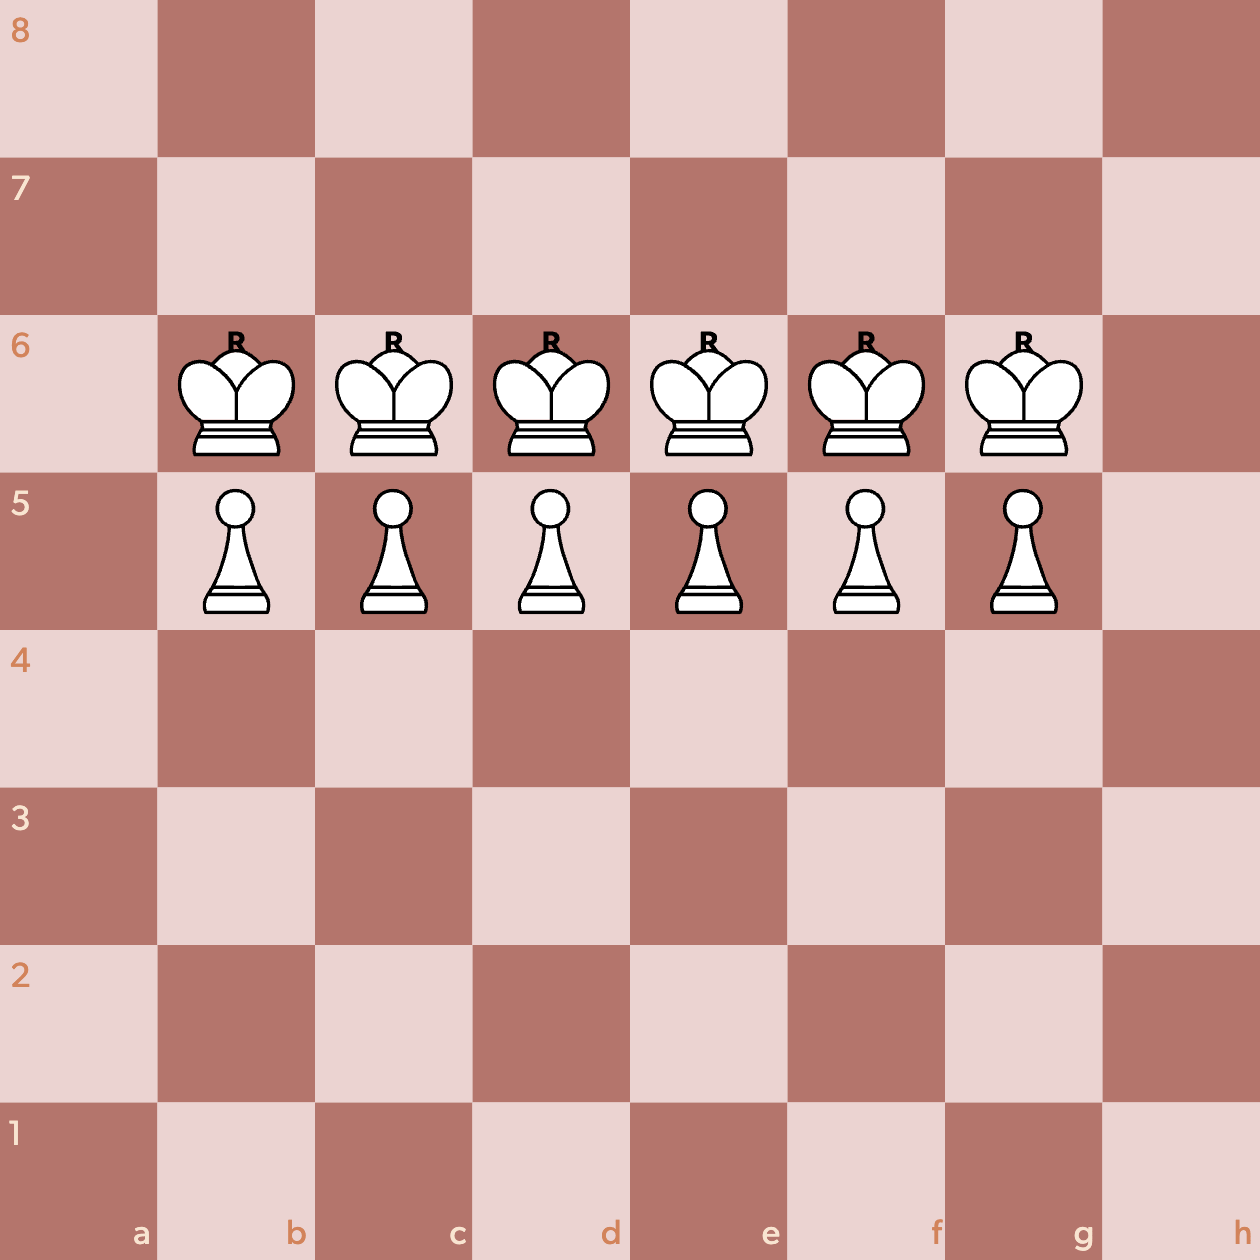
The Special Case with Knight Pawns
What was that we mentioned about knight pawns needing to be promoted in a specific way? Let’s go to our goal position, with our king on the 6th rank and our pawn on the 5th rank—this time on the b-file.
Promoting a knight pawn.
When we had this setup on the e-file, we had the freedom to choose move in either direction with our king in order to make way for our pawn. When working with knight pawns, it is important to know that our king needs to move towards the edge of the board.

The white king needs to move to the outside!
This will allow us to promote in the same way as before!
Let’s take a look at why playing Kc6 in this position is a mistake.
What happens if the white king moves towards the center?
Kc6 allows black to move to a7.
Black plays to a7.
And if we take the bait and advance our pawn to b6 with check, this game is now in a drawn position.

White gives up the advantage!
Black can retreat to a8.
Black plays to a8.
And now what do we do? Kc7 immediately stalemates our opponent.

Stalemate!
And if we advance the pawn with check:
What about a pawn check?
After the black king goes to b8, now what?
White is out of options.
If we try to keep an eye on our pawn it’s stalemate again.

Stalemate again!
And any other move doesn’t defend the pawn, which allows black to capture the pawn and this game will end in a draw.

White can’t defend the pawn.
So remember—when promoting a knight pawn, the king needs to move towards the edge of the board!

Remember to move towards the edge of the board when working with a knight pawn!
Conclusion
Now you know when you can/can’t win with a single pawn advantage! You can use this knowledge to help you make informed decisions throughout the game, since a single pawn might be all you need to win.
If there’s anything that you need help with this week please feel free to get in touch with Coach Lucas at lucas@rookly.com.
Looking forward to another great week of chess!